Recent Questions
Q: I have used for your software for Menu creation(Trial version). We integrated it in our appliaction running good on IE 6. It has some whitespaces also. Menu using dhtml is not displayed in IE 7 when integrated in our application. When we call your html directly in IE 7 then it displays.
In Mozilla ,menu is displayed but without transitional Effects.
I am interest buy your software. If we are assured that above issues will be fixed in licensed version.
A: > Menu using dhtml is not displayed in IE 7 when integrated in our application.Try to set exact width for the menu, for example: var menuWidth="300px";
> In Mozilla, menu using dhtml is displayed but without transitional Effects.Filters and transitional effects are features of Internet Explorer5.5+ only.
See more info here:
http://www.deluxe-menu.com/filters-and-effects-sample.html
Q: I am having a problem creating a submenu. I did not get any js errors but nothing happens.
What I have found is that even when I have dynamic=1;
I was getting an error saying object expected so I added the dmenu_dyn.js manually (i.e. <scripttype="text/javascript"src="../../Javascript/menu/dmenu_dyn.js"></script>) but now get no errors but no submenu is created.
Do I have to add all the js files in the menu folder manually as I thought it was just
<scripttype="text/javascript"src="../../Javascript/menu/dmenu.js"></script>
that was needed.
All, I am trying to add a submenu under the challenge topmenu.
function addChallengeItems(){
dm_ext_createSubmenu(0, 0, 3, ['Buy Deluxe Menu Now!', "order-deluxe-menu-purchase.html", "", "", "Buy Deluxe Menu Now!", "_blank"]);
}
And then a href that calls addChallengeItems()
<ahref="javascript:addChallengeItems();">add</a>
A: There is no need to add all engine files into your menu folder.
You can add only
dmenu.js
dmenu_dyn.js
More info about Description of Files you can find here:
http://deluxe-menu.com/description-of-files-info.html
Please delete also the following line from your code
<script type="text/javascript"src="../../Javascript/menu/dmenu_dyn.js"></script>
Try that.
Q: Also, when I edit "testlink.htm" to any other htm filename, no file isloaded!?
A: Please, make sure that the file that you set for the link exists onyour website and it's placed in the same folder where testlink.htm file is placed.
You can also use absolute paths for links.
Q: I can't make my menu work in at Dreaweaver template - why?!
A: Deluxe Menu wasn't developed as Dreamweaver/Frontpage extension,BUT you can use it as standard Javascript files. To install the menuinto your html page:
1. open the page in Dreamweaver/Frontpage
2. open html source code of the page
3. add several rows of code (<script> tags), For info see:
http://deluxe-menu.com/installation-info.html
That's all.
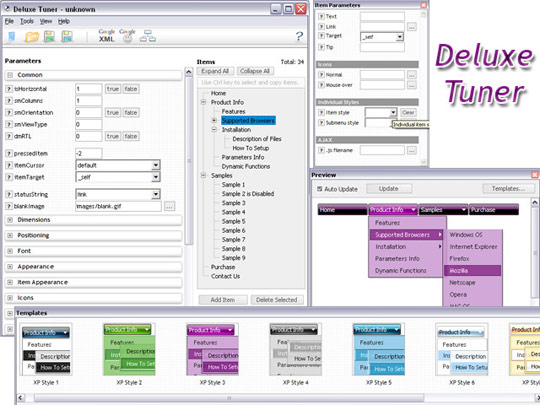
To create and configure your menus use Deluxe Tuner application
(included into the trial package):
http://deluxe-menu.com/deluxe-tuner-info.html